
Creating a Mood Board
I created a mood-board of images that I found on the internet. There were photos of Anglo-Saxon burhs, reconstructed houses as well as a burnt down house.

Concept Art
To plan what I wanted some of the objects in the scene to look like, I developed some concept art for the house, fence, burh wall and the destroyed house. In some cases I was not happy with the first iteration, therefore I chose to create a second iteration.
My first iteration of the burh wall was missing the slits on the top of the tower. The beam of wood that goes across the wall itself was also too thick; to change this, I sketched the object again.
My first rendition of the fence appeared more boxier and sharp then I wanted it to. As a result, I drew it again, this time trying to draw cylinders instead of cuboids.


Chosen Art Style
It was crucial that I decided what art style that I wanted my art to be made with, therefore I could maintain it throughout. I decided on mid-poly, since I want the objects to have some detail, but I plan to add extra detail using normals when I create some of the materials. I wanted the textures to be semi-realistic and overall, I didn't want the scene to be perfect and instead to feel natural.
Modelling
The first object that I modelled in the scene was the house. I began this process by creating cube and extruding the top of it to form the roof. So that it protruded more than the house itself, I extruded the top of the building upwards, and then the sides of the new mesh outwards.


Since the house was going to have an open door, the inside of it would be visible if there was a moving character around the environment. As a result, I decided to add some inner walls to the building. I had to do this because faces can only be viewed from one side. One way I tried to add these walls was by adding a solidify modifier, however this did not work. I then tried duplicating the floor and walls, scaling them down and flipping the normals so that the faces are the right way around. Then, I filled in the ceiling with faces to avoid the roof being see-through from the inside. Lastly, I lined up the edges correctly and filled in the gap between the door and the inside walls with faces. This approach worked a lot better than the solidify modifier. Below I show the effect that both methods had.


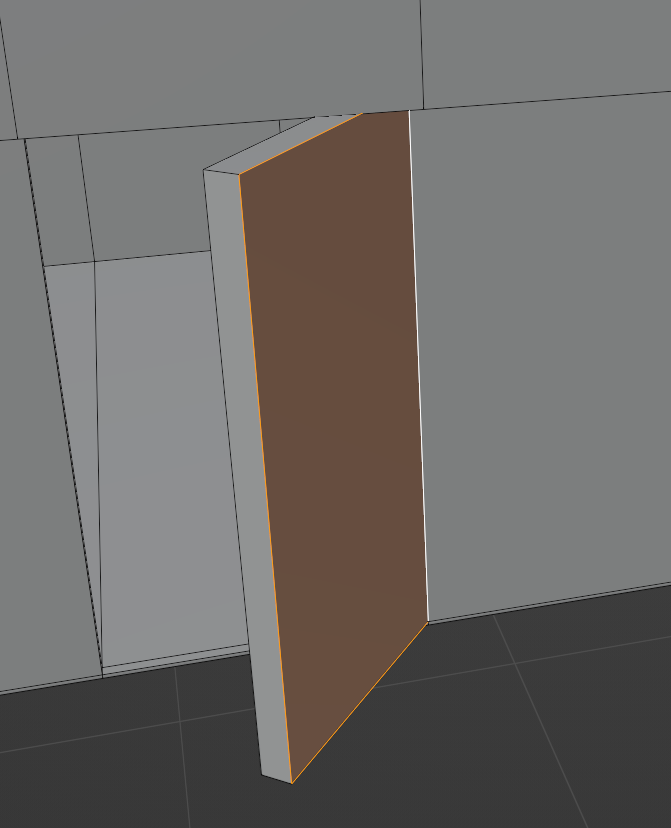
To add a door to the house, I extruded an edge of the door frame to create a plane. From here, I could extrude this plane along the normals to give the door some depth.
In the concept art for the house, there was a beam of wood that surrounded the house. I created this adding loop cuts and extruding the faces between them. Extruding these all at once moved all of the faces in the same direction, therefore I had to use the extrude individual faces tool. One problem was that the corners of the beam did not exist yet. As a result, I had to manually add these in my selecting edges, duplicating them and copy and pasting the x-coordinates to ensure that they are lined up perfectly. Once I had done this, I deleted the faces that would become interior faces after the next step, which was using the fill tool to create new faces that would form the corner of the beam. I repeated this for all four corners of the object.


I realised that it would be better if the door was a separate object so that if I were to put it in a game engine, I could rotate it separately. As a result, I selected the the faces that made up the door and separated it from the house. This also meant that I could rotate it in blender as if it was closed, and move the edge of the door to the other end of the door frame so that it was the correct width, whereas before I simply made it as wide as I thought it should be. Also, the door was lacking detail. To fix this, I added a pair of beams to it that would act as a piece of material that people could grab on to, allowing them to open the door. Originally I wanted a door knob on the door, and this was evident in my concept art, however when I checked my mood-board again, I decided to avoid adding one of these because they were not in the photos at all. I added the beams in by creating loop cuts and extruded the faces that they formed.


Originally I planned to give my house a window in the concept art, however a lot of the ones in my mood-board lacked one so I chose not to.
The majority of the huts in the photos in my mood-board had a fence. Creating this was relatively difficult. I began by creating a cylinder. After that, I added some loop-cuts to it to try and add some geometry. With this, my idea was to select some of this and use the Loop-Tools addon and turn it into a circle. This would allow me to extrude the edges that this would form into a circle and create a stick of wood to join to the next support beam. However, this did not work as I intended. Then, I tried seeing if using a Boolean modifier would create too many n-gons, or if it could be fixed by converting them to tris and from there quads, however this made the geometry too messy and there were a lot of n-gons. I wanted to keep the mesh as clean as possible. Then I deleted the cylinder, created another one, deleted three quarters of it, and used the knife tool to cut out a quarter of the circle. Then, I used the mirror modifier to mirror the object twice. Doing this gave me an idea of what the whole circle would look like, and allowed me to adjust the positions of each vertex to make it more rounded. Although it was impossible to make it an exact circle, this did not matter as much since sticks are not perfect circles either and this matched the natural look that I wanted to try to give to as many objects in the scene as possible.


Now that I had one part of the fence, I wanted to turn it into a whole fence. To do this, I applied the modifier and moved the edges of the fence around to make it taller. Then, I extruded the edges that formed the circle and use “S” + “Y” + “0” to flatten out the bit that I have extruded. To copy what I had just done without redoing it, I used another mirror modifier. To make sure that it mirrored in the correct location, I had to change the origin point of the object by snapping the 3D cursor to the end of the object, then changing the origin point of the object to the location of the 3D cursor. Then, I applied the mirror modifier. At this stage, I noticed that this approach had cause an n-gon to form. I fixed this by using the knife tool to create an edge loop around the object. I also moved a vertex one either side to make the object more cylindrical.


To make the fence longer, I deleted half of the support beam at one end of the fence, selected half of what was left over, duplicated it, separated it in to a new object, rotated it by 180 degrees along the Z axis, changed the origin point to the middle of the support beam, and copied the Y-coordinate value of the end of the old object and make it the Y position of the part that I separated. Then I joined the objects together, ensuring that I had merged them to join the meshes together. From here, I had an area that I could select and duplicate to extend the fence more. I used this to make the fence longer, trying to add variation to the lengths of the individual sections to add variation.


The fence was too short. To change this, I had to add another mirror modifier to the object. This would mean that it mirrors what is on the bottom and add it on the top, achieving my goal of wanting it to be taller. Then to make it taller once again, duplicated part of the mesh and moved it upwards. When it was at the right position, I merged the edges together. This left a hole in the mesh, so I had to delete a part of the mesh, duplicate a different part, and bring it over to where the old part that I deleted used to be, and merge the two parts together. There were also a lot of edge loops that were unnecessary, therefore, to reduce the number of polygons in the mesh, I dissolved them.


I wanted the fence to have a corner. To add one, I had to try to use a part of a support beam to combine two different pieces of the support beam that has the hole in into one piece. I began this process by selecting half of one of the support beams. Then I separated this into a different object and isolated it. After that, I duplicated it again and this formed the second of the two pieces that I would need. Sadly, the holes would overlap if I had it at a 90-degree angle. Therefore I had to find the smallest angle where the faces would line up and the holes would not overlap. Once I had found this, I merged the vertices together my distance, and deleted any faces that I had to. This removed any excess geometry and meant that the holes were visible. All of these steps resulted in giving me a piece of the fence that I could use as a corner piece, and give the fence some shape.
At this stage, I noticed that some of the loops that I had created earlier to fix the n-gon did not continue far enough up. I fixed this by using the knife tool again to extend the edges. To add the corner piece to the fence, I had to begin by deleting the edges of the fence that would be replaced by the corner. Then, I put the corner piece in the area that it should go and joined the objects together. Now I could have the fence turn, it allowed me to extend the fence even further, so I chose to do this until I was happy.


nce I had repeated the process of extending the fence until I was happy with it, I needed to fill in the holes on the top of the fence. To do this, I used the grid fill tool. However, the fence was too perfect; I wanted it to become more natural. To achieve this, I used the wireframe viewport shading option to select various parts of the fence, one at a time, and from there I was able to move these individual support beams around to make the fence more unpredictable. Doing this also allowed me to link up both ends of the fence to the house, since I was moving the beams around.


Creating Materials and UV Unwrapping
To add materials to the objects, I had to UV unwrap them first.
Whilst doing this, I noticed that the beams of wood that go in front of the house and behind it don’t protrude enough. This made the beams look like they were all one piece of wood which was not correct. To fix this, I decided to select all of the faces and extrude them individually. This made the beams look as if they were all individual pieces of wood and not one large one. I also noticed that I had a lot of interior faces. I selected them all and then deleted them, making sure that I did not delete the edges as well because this would have caused the faces around the interior faces to be removed too.


A lot of my materials consisted of a noise texture node connected with a colour ramp node, then in some cases this was connected to a mix colour node that mixed the texture with a different one that also had a colour ramp, for example to create the wood below, a wave texture was mixed with the noise texture.
An issue that I had was trying to find a colour that matched the one on the mood-board. To solve this, I opened the mood-board image that I had exported in Paint 3D, allowing me to use the colour picker tool. This allowed me to know exactly what the colour of the house was in the image, and also let me copy and paste the hex code into Blender. I also realised that the planks of wood were only displaying on two sides of the object since the bands could only go around one axis. To fix this, I made another material with the same nodes on it and changed the band axis from X to Y. Since the house would be made of different materials, I also made a new blank material called “House Default”. I applied this to everywhere and then from here, I can apply the materials that I make to individual areas.


To make the ground texture, I wanted to be able to decide which areas were green and which were brown. To do this, I decided to use texture painting. I began doing this by creating a new image, adding this image to the material that was applied to the ground, and then painting the whole plane green. From here, I added the brown area and decided that it did not look amazing. Adding a transition helped improve the appearance of the texture a lot. Once I was happy with this texture, I saved it as an image. Then I went into the shading tab and used a mix colour node. This allowed me to mix the colour that I had just made with a noise texture node, as well as a colour ramp node, to make some patches of the ground have a different colour to the rest of it. To add some depth to the plane, I made another noise texture node which filtered into a colour ramp node, and then this went into a bump node. Lastly I plugged this into the normal section of the BSDF and this gave the plane some bumps.


To create the texture for the wall of the burh, I decided to create a some shading materials and then bake it on to an image. From here, I could use texture painting to paint some of the wall brown to show that areas have been burnt. I baked two separate images, one for each wall, since the size difference meant that one image would not work for both objects.
Below are the shading material setups that I used before I baked the material, one for the plank texture and one for the plain texture, as well as the baked material images.


Camera, Lighting and Rendering
I added a sun light to the scene and positioned the camera so that everything was in view. I changed the render engine to cycles, the device to GPU compute and the resolution to 2K. Then I rendered the scene.
After doing this, I noticed that part of the scene was too dark, and as a result details in the materials that I had created in that area could not be distinguished. To fix this I added a point light and rotated it so that it was pointing in that area.
The last step that I did was adding in two planes into the background to add to the sky. I added some emission to these objects to make them brighter and also made them blue to match the colour of a sky.


References
Lambert, T. (2021). A History of Oxford. [online] Local Histories. Available at: https://localhistories.org/a-history-of-oxford/#google_vignette [Accessed 22 Jan. 2024].
Anglo-Saxon style building destroyed by fire in Nottinghamshire. (2021). BBC News. [online] 23 Sep. Available at: https://www.bbc.co.uk/news/uk-england-nottinghamshire-58666587 [Accessed 23 Jan. 2024].
Schmidt, A. (2022). Blender Simple Noise Bump Tutorial. [online] www.youtube.com. Available at: https://www.youtube.com/watch?v=7Zx2sKjB_10 [Accessed 28 Jan. 2024].


